How To Make Crease Protectors With Cardboard: DIY Tips
Make simple crease protectors by folding and cutting cardboard into U-shaped, reinforced sleeves.
I have built many DIY storage solutions and tested cardboard crease protectors across projects. This guide explains how to make crease protectors with cardboard step by step, which cardboard to pick, how to cut and fold for strength, and real tips from hands-on experience. Read on to learn practical ways to protect folds, avoid mistakes, and adapt designs for art, clothing, or documents.
Materials and tools you need
Gather a few simple items. You need sturdy cardboard, a ruler, pencil, utility knife, cutting mat, and strong tape or glue. Optional items include corner guards, wax paper for acid-free separation, and a bone folder or blunt tool to crease cleanly.
Suggested cardboard types include corrugated cardboard, chipboard, and recycled cereal-board for thin needs. For archival or fabric use, choose acid-free cardboard or wrap with acid-free paper. Using the right cardboard helps the crease protector last longer and protect the item better.

Why make crease protectors with cardboard
Cardboard crease protectors are cheap, quick, and custom-fit. They stop sharp folds, distribute pressure, and reduce damage when stacking or shipping. Making crease protectors with cardboard saves money compared to buying plastic or archival sleeves, and you can size them precisely for your items.
I’ve used cardboard protectors for shipping art prints and storing folded shirts. They held up well in transit and cut down on visible creases. If you need archival-grade protection, pair cardboard with acid-free layering.

Step-by-step: How to make crease protectors with cardboard
- Measure the item.
- Lay the item flat and measure width, depth at the fold, and full length. Add 1/4 to 1/2 inch for clearance.
- Mark and cut a rectangular strip.
- Draw a rectangle on the cardboard that equals the length plus two times the depth. Cut with a sharp utility knife on a safe surface.
- Score the fold lines.
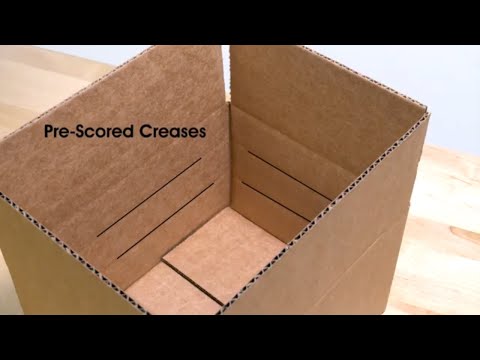
- Use a ruler and bone folder or blunt edge to score two parallel lines where the fold will be. Scoring helps make a clean U-shape.
- Fold into a U shape.
- Fold along the scorings to form a U that fits the fold of the item. Make sure the sides are even and align.
- Reinforce the edges.
- Tape or glue the open edges where needed. Add a strip of tape across the outside of the crease to prevent splitting.
- Add padding if needed.
- Place thin foam, tissue, or acid-free paper inside the U for fragile items. This cushions the fold point.
- Test the fit and finish.
- Slide the protector over the item’s fold and check movement. Trim or refold slightly for a snug fit.
These steps make basic but strong crease protectors. Repeat the process for different sizes and thicknesses. If you need many protectors, create a template to speed up production.

Design variations and sizing tips
Choose a design to match the item you protect. Common variations include short U-sleeves for shirt folds, long sleeves for posters, and corner guards for pages. For heavy materials, double up cardboard layers and glue them together.
Sizing tips:
- Measure the depth at the fold accurately to get the right U width.
- For delicate textiles, increase clearance by 1/4 inch to avoid tight pressure.
- For artwork, make sleeves slightly longer than the item to protect beyond the fold.
I once made long sleeves for vintage posters. Adding a second layer cut sag and kept prints flat. Small changes in width and reinforcement make a big difference in durability.

Practical tips, mistakes to avoid, and maintenance
Practical tips from real projects:
- Use a fresh blade and straight edge for clean cuts.
- Score before folding to prevent cracking the cardboard.
- Wrap cardboard in acid-free paper for long-term archival storage.
- Label protectors with a pencil or removable tag for easy sorting.
Common mistakes:
- Cutting the U too tight, which can stress the item.
- Using thin, flimsy cardboard without reinforcement.
- Skipping scoring and forcing folds that split the board.
Maintenance:
- Check protectors periodically for moisture damage or compression.
- Replace cardboard that shows wear or acidity stains.
- For long-term storage, use archival layers between cardboard and item.
These tips come from trial runs and practical use. They save time and keep items safer.

Troubleshooting and limits
If the protector bends or crushes, use heavier cardboard or add a second layer glued snugly. If tape lifts, switch to cloth-reinforced tape or glue. For museum-grade needs, cardboard alone may not suffice; combine with archival sleeves or museum board.
Limitations to know:
- Cardboard can absorb moisture and warp.
- It may not be suitable for extremely valuable or highly acidic-sensitive items unless combined with archival barriers.
- Not fully waterproof—avoid using alone for wet environments.
Be honest about what cardboard can and cannot do. Use it for everyday protection and shipping, and opt for archival products when preservation is critical.
Personal experience and real-life examples
I used cardboard crease protectors when moving a small art studio. I cut U-sleeves for three sizes of prints and labeled each sleeve. During transport, prints stayed flat and arrived undamaged. The cost was under a dollar per protector using recycled board.
A lesson learned: always test one protector with the actual item before batch-making dozens. One mis-measured template costs time and materials. Simple practice runs avoid waste and give consistent results.

When to choose cardboard vs alternatives
Choose cardboard when you want cheap, customizable protection that’s easy to make. Pick plastic or archival sleeves if you need water resistance or long-term chemical stability. Cardboard wins for bulk shipping and rapid needs.
Consider hybrid approaches:
- Use cardboard for outer reinforcement and acid-free sheets inside.
- Pair corner guards with cardboard sleeves for extra protection.
This helps you balance cost, protection level, and longevity.
Frequently Asked Questions of how to make crease protectors with cardboard
How thick should the cardboard be for a crease protector?
Use corrugated cardboard or 1/8 to 1/4 inch chipboard for most needs. Thicker board is better for heavy items, while thin cardboard works for lightweight fabric.
Can I use recycled cereal boxes for crease protectors?
Yes, recycled cereal-board works for light use and short-term protection. For long-term storage, wrap it with acid-free paper or use a more stable board.
How do I make a protector archival-safe?
Choose acid-free cardboard or wrap regular cardboard in acid-free paper between it and the item. Also store in a cool, dry place to reduce acid migration and moisture damage.
Are taped edges strong enough for shipping?
Good cloth-reinforced tape or heavy-duty packing tape is usually strong enough. Reinforce with a glued second layer for rough shipping conditions.
What sizes should I make for common items?
Make small U-sleeves for clothing folds (4–6 inches deep), medium sleeves for prints (6–12 inches deep), and long sleeves for posters (length matches poster). Measure the fold depth and add clearance.
Conclusion
Making crease protectors with cardboard is an easy, low-cost way to protect folds in fabric, paper, and art. Follow simple measuring, scoring, and reinforcing steps to build durable sleeves. Start with one test protector, adjust size and strength, and scale up once you have a reliable template. Try making a set this weekend and see how much damage you can prevent—share your results or questions in the comments and subscribe for more DIY storage tips.